On October, 17, 1989, NeXT announced that accelerator drives would be
shipping in new network user systems, with a ship date of Nov. 1. The
drives would also be available as a free upgrade for earlier systems if
you contacted NeXT. The accelerator drive is a 40MB Quantum 40s
ProDrive. The intent was to use the small disk as a cache in order to
address performance concerns caused by the Canon MO drive. These are
3.5" drives which were also used in many Apple systems. By initializing
the disk in disk builder with a drive name of "swapdisk," Nextstep 1.0a
and later will
automatically use the disk for the swap file. The OD only systems were
much more responsive with this configuration. The swap disk should be
SCSI ID 6.
Restoration:
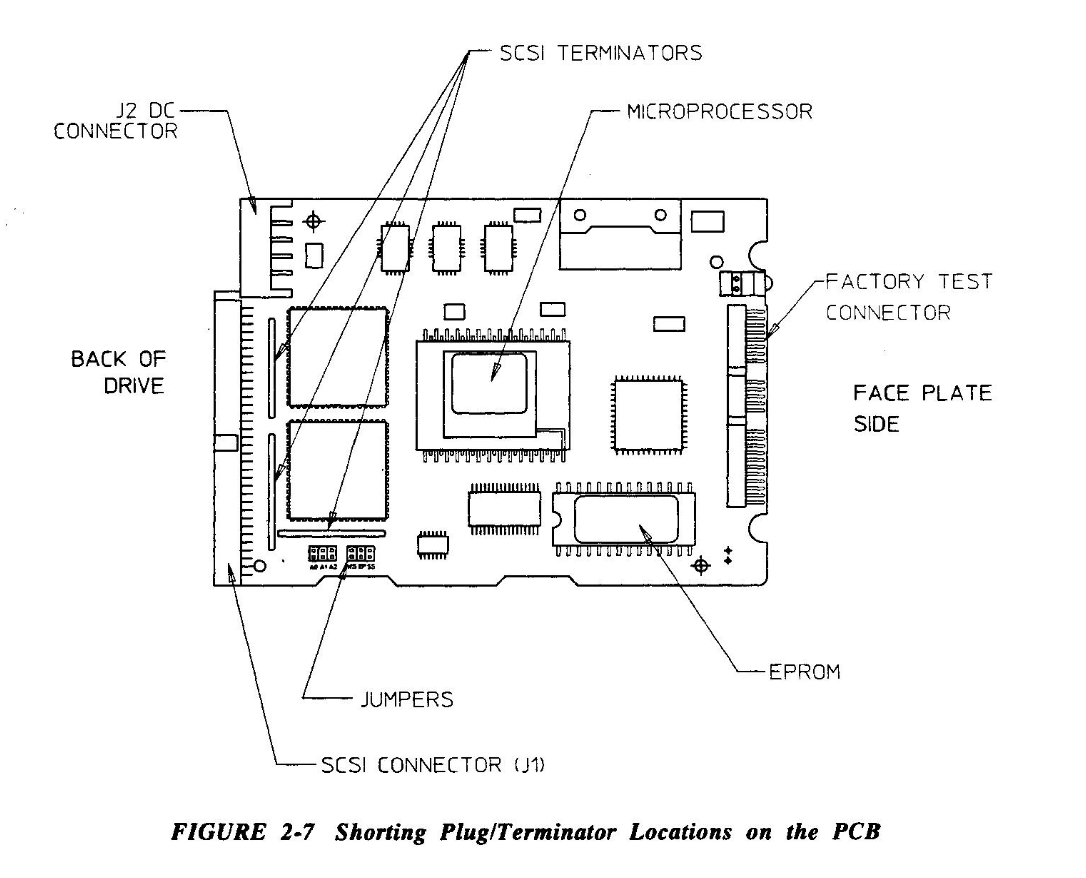
The ProDrive series has multiple failure points. The most common is
commonly referred to as "Sticky Heads." Inside the drive there are
rubber bumpers which the drive arm rests on. Over time these have
broken down and literally become sticky enough the freeze the arm in
place. Firstly, as usual, the electrolytic capacitors should be
replaced.
Whole kit may not be necessary, but they are verified to work.
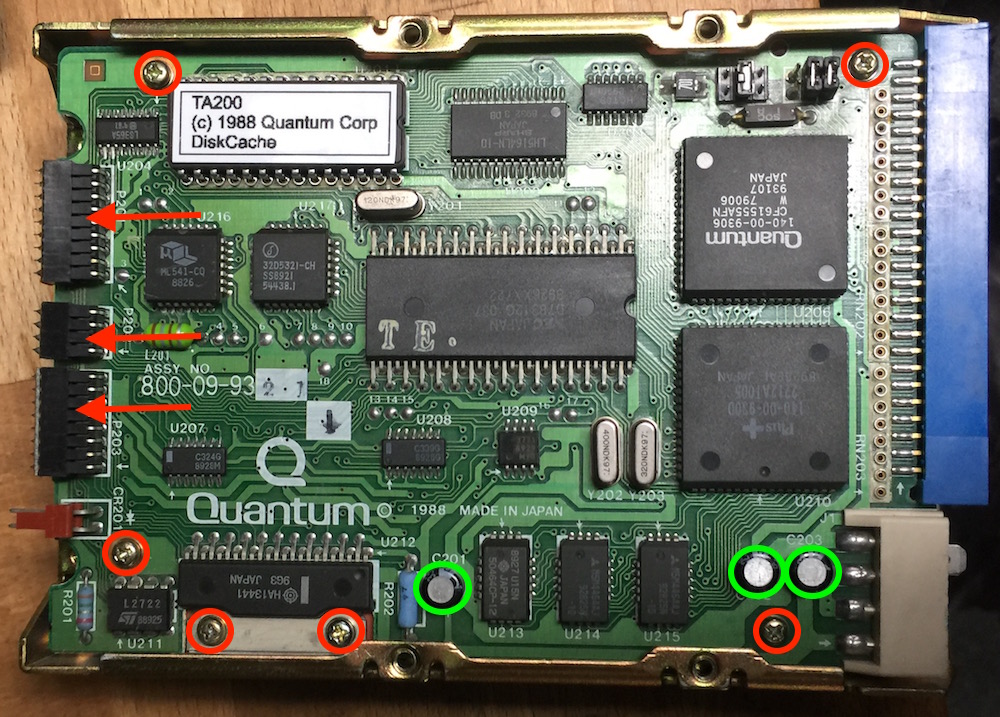
1) Begin by removing the logic board. There are 6 screws (annotated
red) and 3 ribbon connectors to remove. Lift the board from the side
with the ROM chip first, then pull up and out.
2) Replace the three 10uF 25V capacitors.
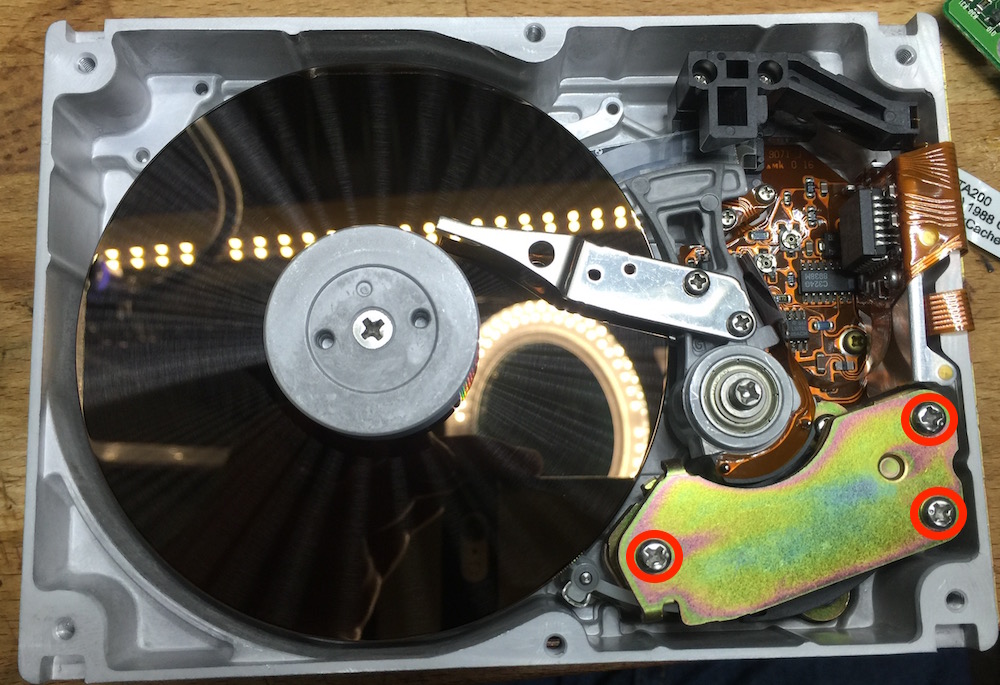
Now it is necessary to remove the top case. You want to do this in a clean setting. Stray dust can kill the drive heads.
1) Remove the screws around the edges (annotated red)
2) Break the warranty seal and remove the bolt (annotated green). Do not try to unscrew the screw in the center.
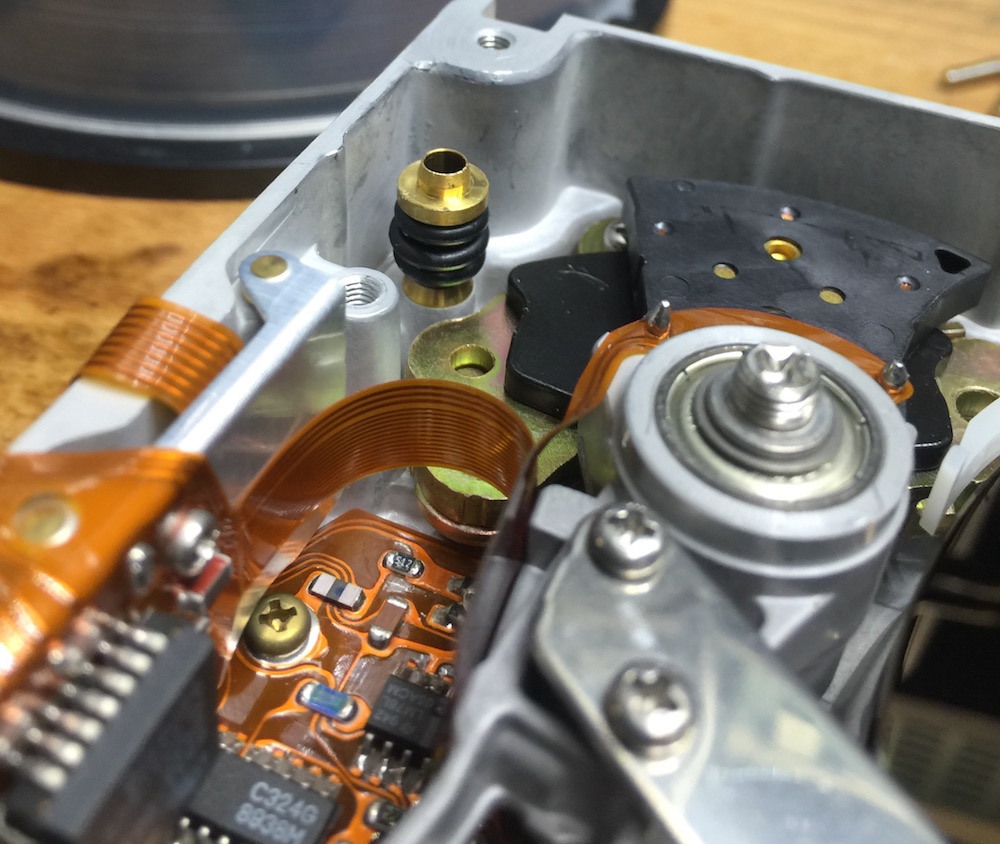
The top lid will now lift up and off exposing the drive platters. The rubber stoppers are at the base of the arm.
1) Remove the 3 screws (annotated red) holding the cover from the arm magnets. Lift up to removed the first rubber bumper.
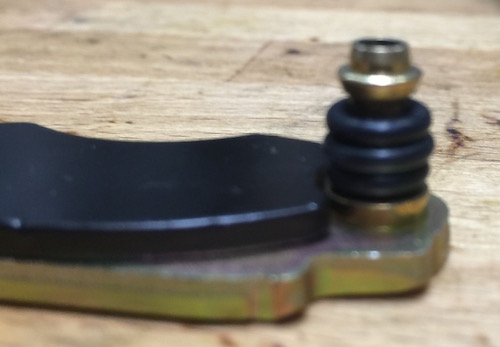
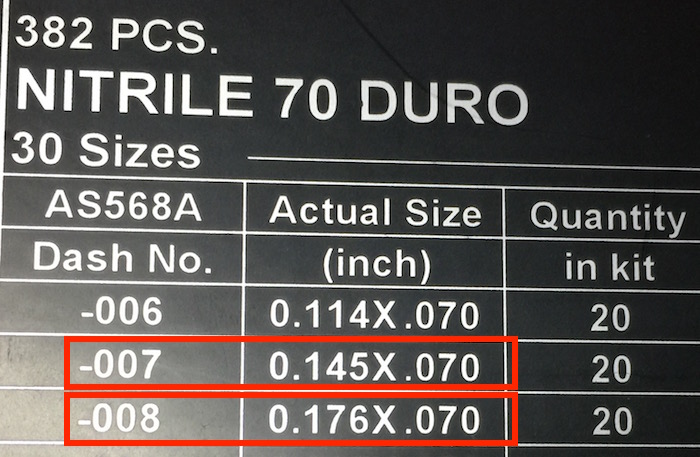
2) Cut away the existing rubber. Replace the rubber stopper with a
stack of three o-rings from the kit. (007, 008, 007) The larger o-ring
is used in the middle to provide extra overall width to the stack while
the smaller o-rings keep the stack snuggly in place.
3) Now perform the same procedure on the other rubber bumper. This one
is a little harder to reach. Perform the procedure in place and don't
try to remove the brass peg.
Now reassemble the drive in reverse.
Comments:
Note that the top lid of the drive above is from an HP. I used the
platter section of a Quantum 40AT (IDE) drive with a logic board from
the 40S. The drive mechanism is compatible.